Midway CLI
Since the underlying capabilities of the CLI are derived from the existing module functions of the community, in order to reduce the maintenance costs and understanding costs caused by transitional packaging, each function in the CLI will gradually become the existing modules of the community, and the CLI library will cease to exist. Iterate.
The subsequent changes for this purpose are
- Development will change from
midway-bin devtomwtsc - Compilation will change from
midway-bin buildtotsc - Test will change from
midway-bin testtomochaorjest - Coverage will change from
midway-bin covtojest --coverageor other similar directives
@midwayjs/cli is a new version of Midway system tool chain, which is integrated with Serverless and the original application tool chain.
Foundation entrance
@midwayjs/cli provides two entry commands. midway-bin and mw commands.
When @midwayjs/CLI is installed in the global system, the mw command is used, such as mw Dev. When installing the cli tool in a project, we usually use the midway-bin command, but remember that the two commands are the same.
dev command
Start the local development command with the current directory.
$ mw dev
  -- baseDir the application directory, usually the folder where package.json is located, and the default is process.cwd()
  -sourceDir ts code directory, automatically analyzed by default
  -p, -- port dev listens on the port, default to 7001
  -- ts TS mode running code
  -- fast speed mode
  -framework the specified framework, it will be analyzed automatically by default
  -f, -entryFile specifies to use the entry file to start the bootstrap.js
  -watchFile more files or folders to modify listening
  -Does not restart automatically when notWatch code changes
Standard Start
$ midway-bin dev --ts
Modify the startup port
For HTTP scenarios, -p or -- port can temporarily modify the port.
$ midway-bin dev --ts --port=7002
Modify the startup path
Specify the root directory of the application, usually the folder where the package.json is located, and the default is process.cwd()
$ midway-bin dev --ts --baseDir=./app
Modify the source code path of ts
specifies the ts code directory, which is automatically analyzed by default.
$ midway-bin dev --ts --sourceDir=./app/src
Change tsconfig position
Specify the location of tsconfig.json by setting TS_NODE_PROJECT.
$ cross-env TS_NODE_PROJECT=./tsconfig.dev.json midway-bin dev -ts
Faster startup method
The default startup method is ts-node, which will be slower when the number of files is particularly large. You can switch to a new compilation method such as swc.
// Use ts-node fast dev mode
$ midway-bin dev --ts --fast

// Use swc fast dev mode
$ midway-bin dev --ts --fast=swc
Monitoring file changes
-watchFile is used to specify more files or folders to modify listening, default listening to files ending in .ts, .yml, and .json in the sourceDir directory (you can specify more extensions through the -- watchExt parameter), and f.yml files in the baseDir directory
// Specify multiple files, separated by commas
$ midway-bin dev --ts --watchFile=./a.txt,./b.txt

// Specify multiple folders and files separated by commas
$ midway-bin dev --ts --watchFile=./test,./b.txt
-- watchExt: Specify more listener file extensions. Default value:.ts,.yml, and.json.
// Specify multiple file extensions separated by commas
$ midway-bin dev --ts --watchExt=.js,.html
Local single-step Debug debugging
The -- debug parameter starts the debug mode. You can use the chrome devtools to perform single-step code debugging:
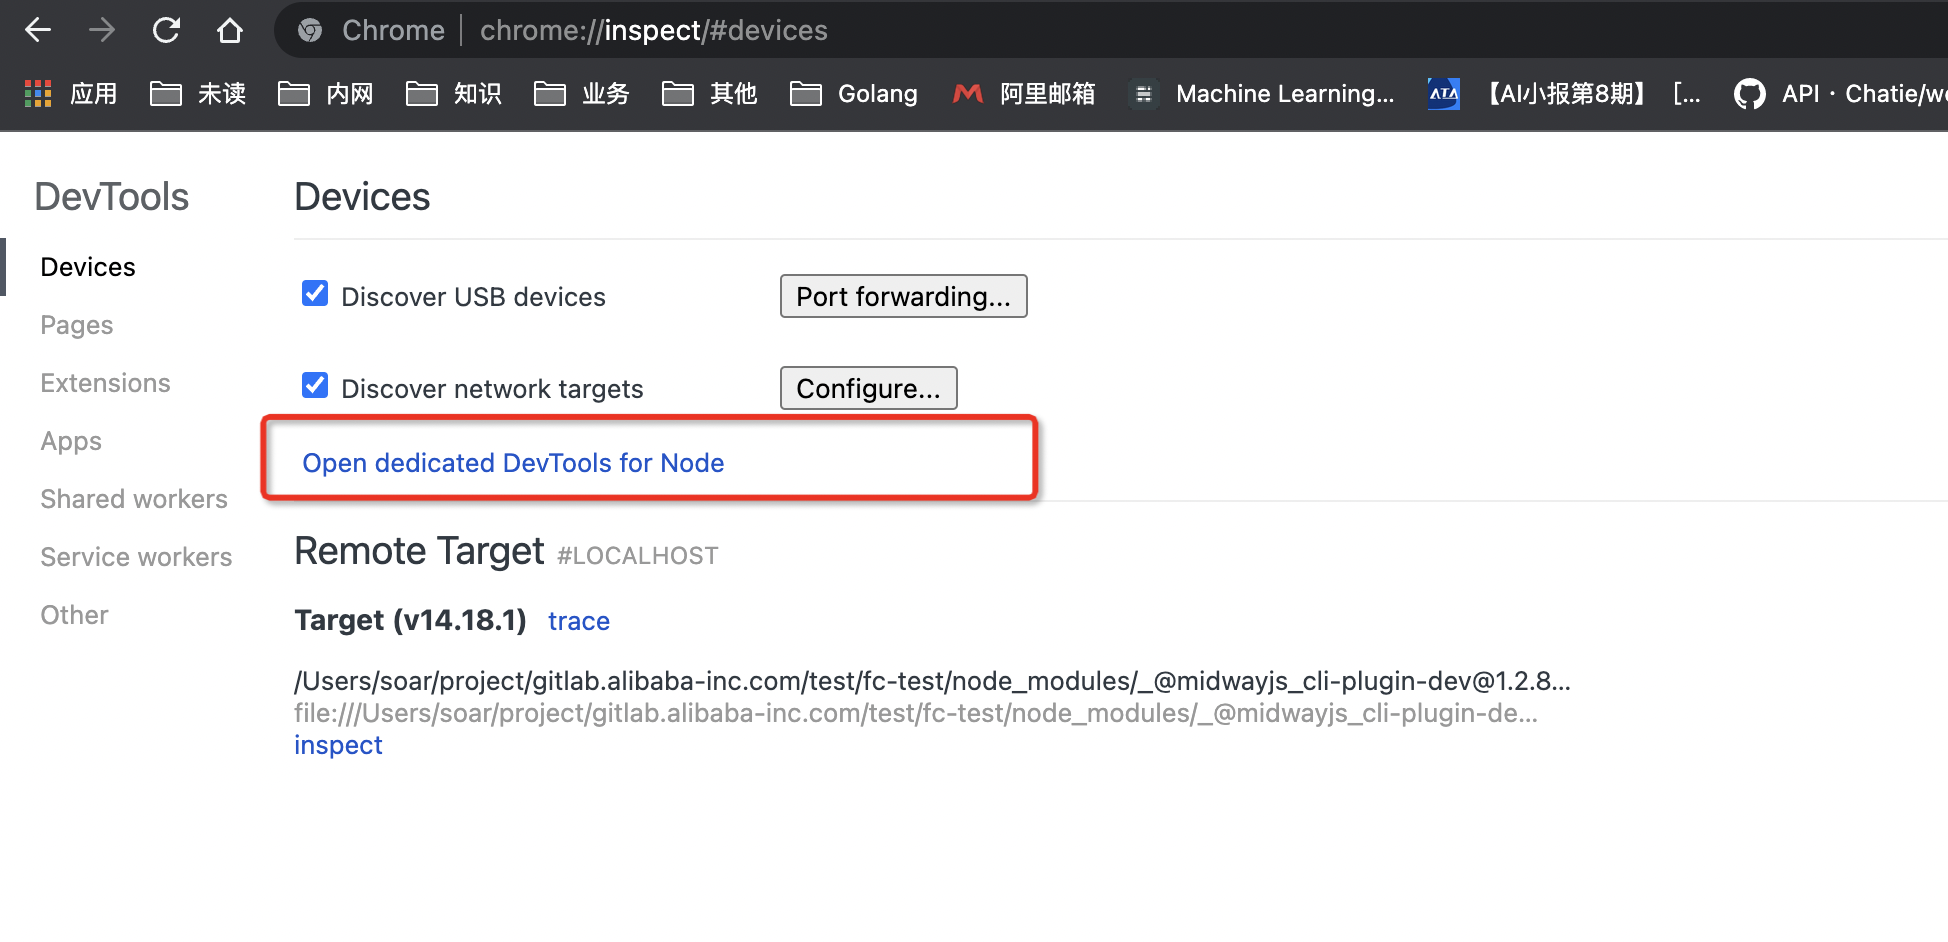
 You can use
 chrome:// inspect/ to open the nodejs devtools for breakpoint debugging:

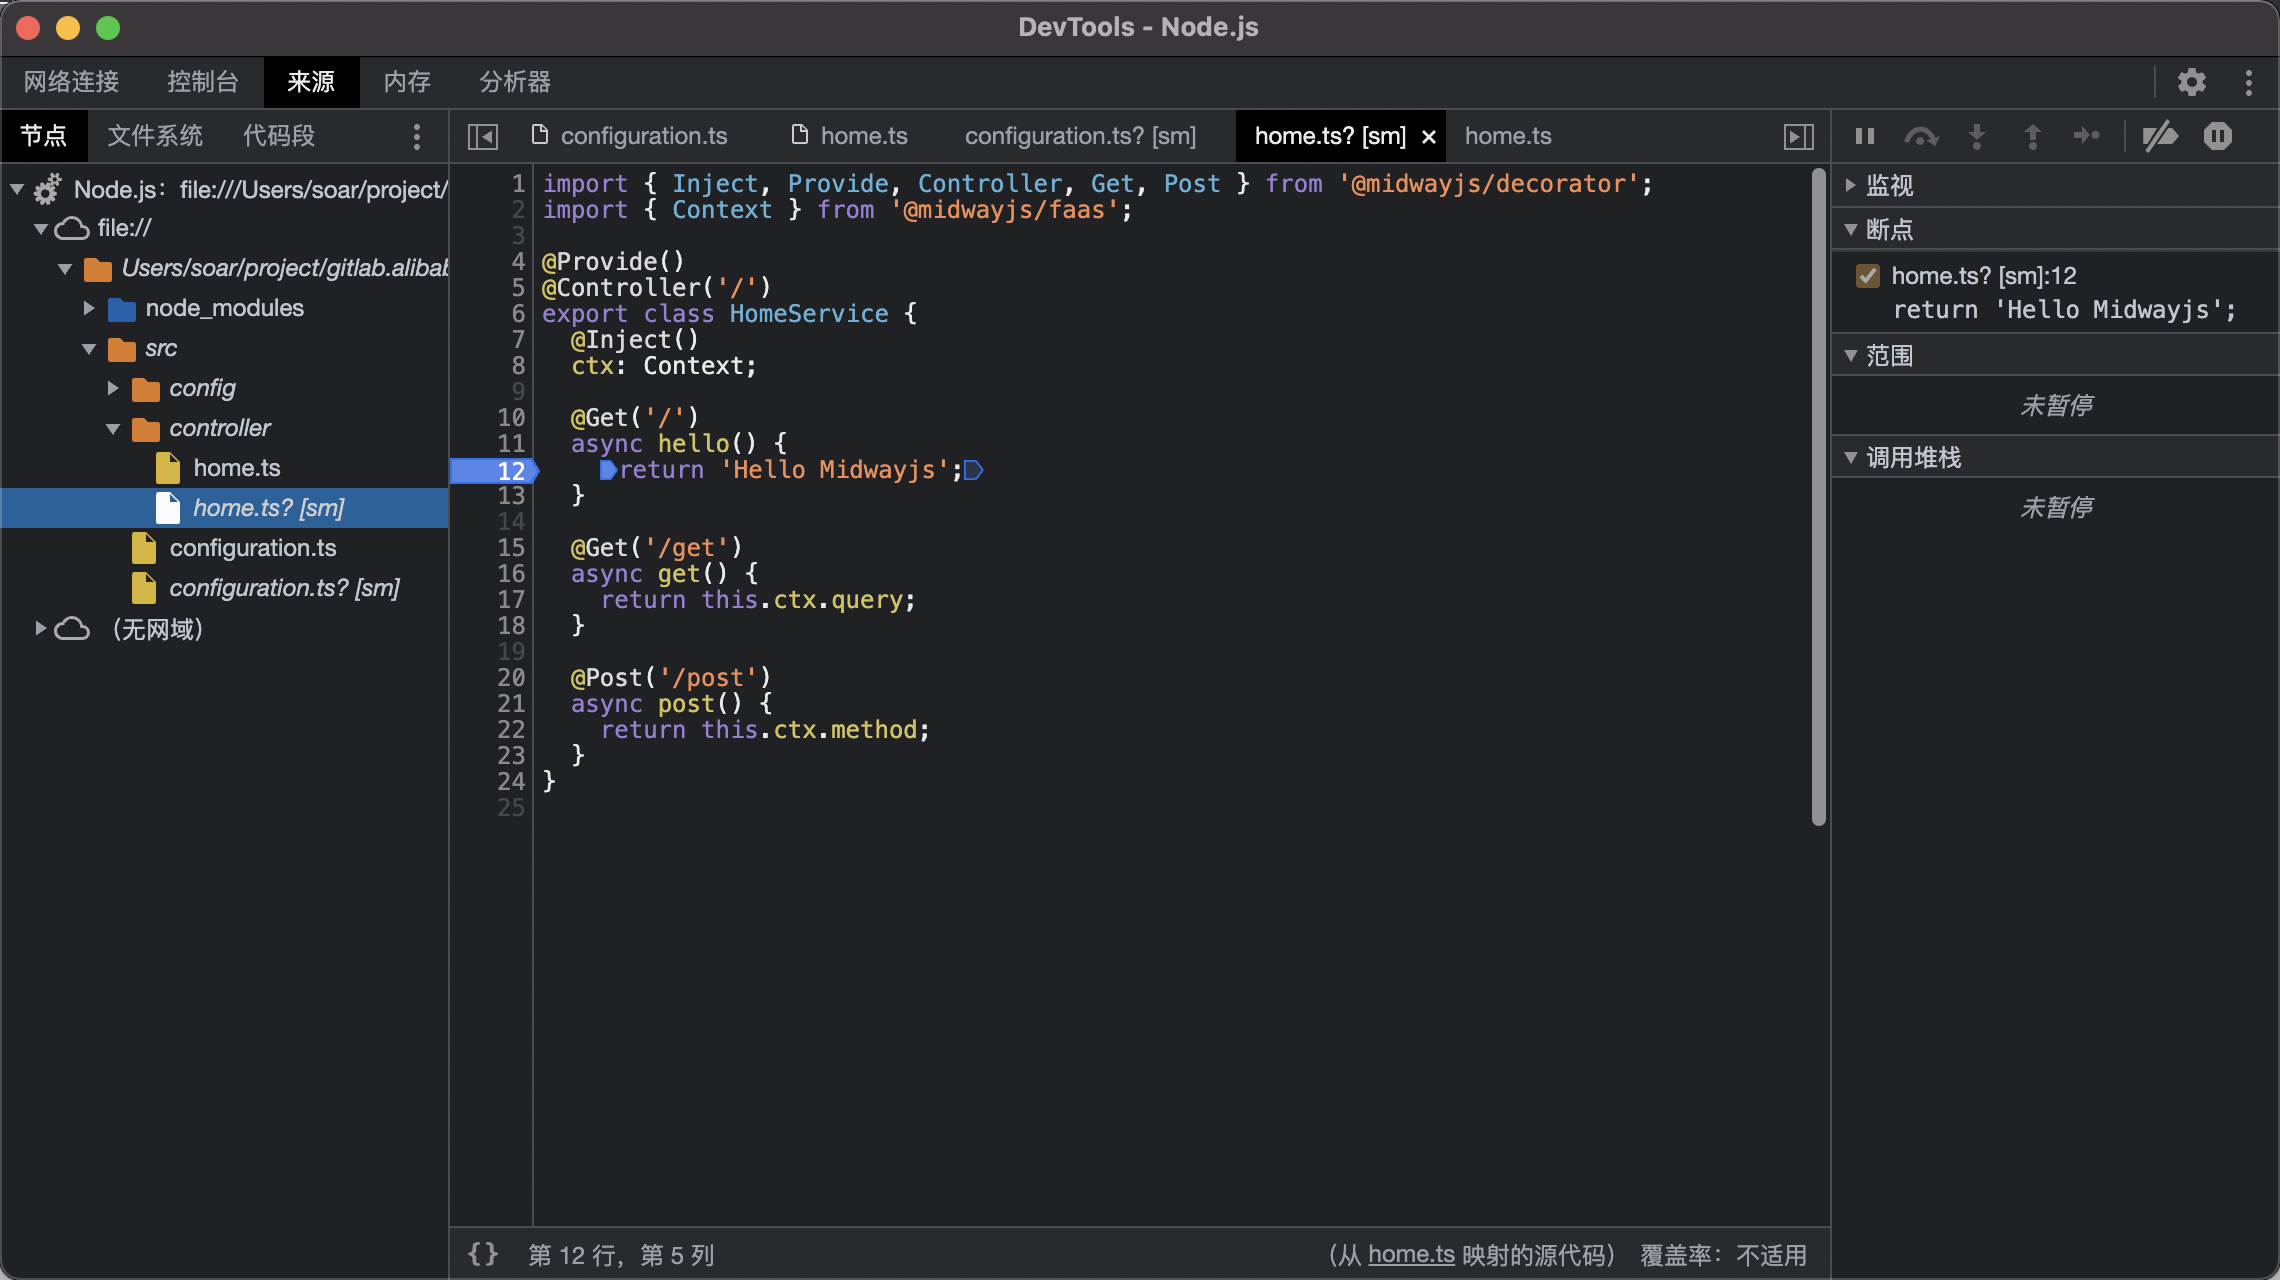
 You can also directly open the link of the
 DevTools protocol output from the command line through the Chrome browser, add a breakpoint to the corresponding code and debug it:

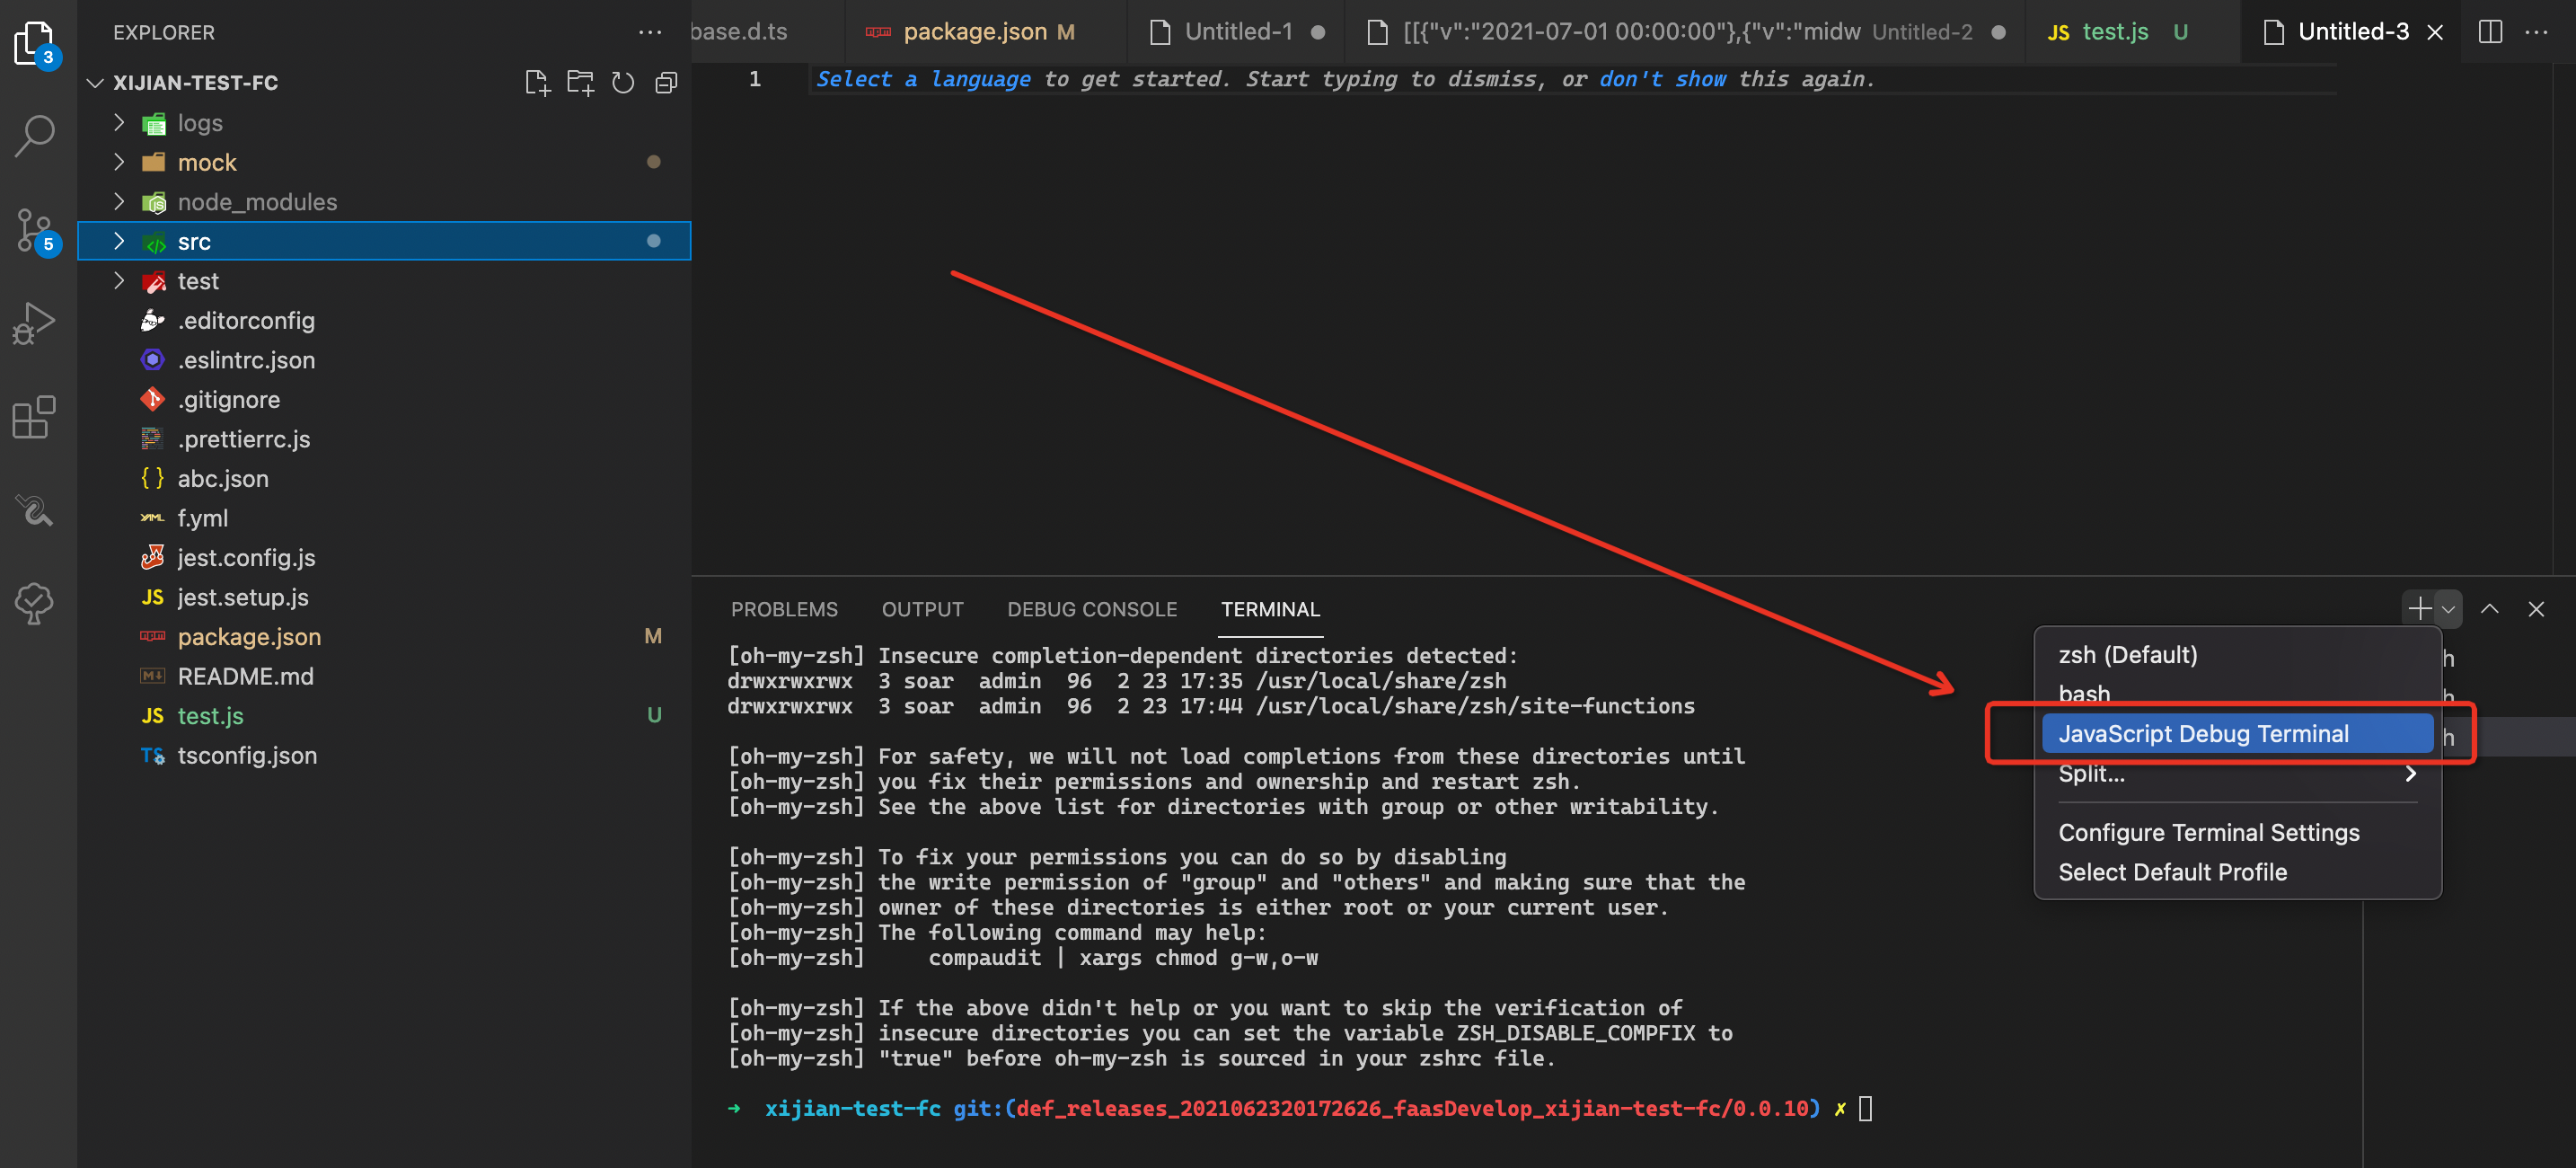
If you use vscode, you can use the js debug terminal of vscode to execute the dev command (without adding the -- debug parameter) to start breakpoint debugging. 
test command
Start the test with the current directory. By default, the jest tool is used. You can use the -- mocha parameter to specify mocha.
$ midway-bin test --ts
  -c, -- cov gets code test coverage
  -f, -- file specifies a test file, such as./test/index.test.ts
  -- ts TS mode running single test
  --forceExit jest forceExit
  --runInBand jest runInBand
  -w, -- watch watch mode
  -- mocha single test using mocha
When you use mocha for a single test, you must manually install the mocha and @types/mocha dependencies in the devDependencies: npm I mocha @types/mocha -D.
If the TypeScript path alias is used in the project, please refer to: [Test](../testing# Configuration-alias-paths)
Use mocha instead of jest
Some students have a special liking for mocha and hope to use mocha as a testing tool.
You can use mocha mode for testing.
$ midway-bin test --ts --mocha
When using mocha for unit testing, you need to manually install the two dependencies mocha and @types/mocha into devDependencies: npm i mocha @types/mocha -D.
Configure alias paths
When you configure paths in tsconfig.json, and the module package import uses paths, there will be mocha for unit testing, which will cause the path to not be parsed, which cannot be solved by importing tsconfig-paths/register
// src/configuration.ts

import 'tsconfig-paths/register';
// ...
Need to add tsconfig-paths and reference it for processing during testing
$ npm install --save-dev tsconfig-paths
$ midway-bin test --ts --mocha -r tsconfig-paths/register
Note that since mocha does not come with an assertion tool, you need to use other tools such as assert and chai to make assertions.
Cov command
Start the test with the current directory and output the coverage information. By default, the jest tool is used. You can use the -- mocha parameter to specify mocha.
$ midway-bin cov --ts
When using mocha for single-test coverage, you need to install the following additional dependencies.
$ npm i mocha @types/mocha nyc --save-dev
Check command
Automatically analyze the problems in the code and give repair suggestions.
$ midway-bin check
Verification of 32 issues has been provided.
build command
Use mwcc(tsc) to compile ts code, which is suitable for standard projects. Please use package for Serverless projects.
$ midway-bin build -c

  -c, -- clean Cleanup Build Results Directory
  -- srcDir source code directory, default src
  -- outDir builds the output directory, which defaults to outDir or dist in the tsconfig.
  -tsConfig tsConfig json string or file location
  -buildCache Preserve Build Cache
deploy command
Applicable to runtime when Serverless projects are released to Aliyun FC, Tencent SCF, Aws Lambda, etc.
Executing the deploy command automatically executes the package.
$ midway-bin deploy

  -Y, -- yes The confirmation released is yes
  -- resetConfig reset release configuration, AK/AK/Region, etc.
  -- serverlessDev Serverless Dev is used to publish aliyun fc functions. the default value is funcraft
  ... all parameters compatible with package commands
Domain name configuration when the function is published
If you set custom.customDomain to auto in f.yml, a temporary automatic domain name is configured when you publish it:
custom:
     customDomain: auto
If you want to cancel the automatic domain name, change the customDomain to false:
custom:
    customDomain: false
If there is a custom domain name, configure it in the customDomain:
custom:
	customDomain:
    domainName: test.example.com
If you need to use https for a custom domain name, you need to set the customDomain to false after configuring the https certificate in the cloud console to avoid resetting to http the next release:
custom:
	customDomain: false
Each route is deployed as a function
You can use a high-density scheme and merge it into one function, f.yml plus the following configuration
aggregation:
  main:
    functionsPattern:
      -'*'
aliyun releases AK error issue
ak can be reset when aliyun is released for the first time or when the -resetConfig parameter is used.
However, it should be noted that a new access group is created by default every time an ak is created. The group name is automatically generated when you modify the configuration. If you want to overwrite the previous AK, you need to manually enter it, as shown in the figure:

The default group used when publishing is default. If you use default-2 as shown in the above figure when modifying the configuration, you need to specify default-2 by using the -- access parameter when publishing:
midway-bin deploy --access=default-2
package command
Applicable to Serverless project construction
$ midway-bin package
  -- npm npm client, the default is to automatically identify and add registry
  -sourceDir the directory where the source code is located, which will be automatically analyzed by default.
  -buildDir build result target directory
  -- sharedTargetDir the target directory of shared files. The default is static. Refer to -- sharedDir parameters
  -This directory will be copied to the $sharedTargetDir directory in the result directory when the sharedDir is built.
  -skipZip skip zip packaging
  -skipBuild skip ts code construction
  -tsConfig tsConfig json string or file location
  -function specify which functions to package, multiple in English, separated
Detailed parameter explanation
-- function: Specify which functions to package. Multiple functions are separated in English.
// Pack
midway-bin package --function=a, B ,c

// Publish
midway-bin deploy --function=a, B ,c
File copy logic when function builds packaging
The content copied by default contains all files that are not suffixed with .ts in the backend code folder (usually src, and src/apis for both front and back ends of faas), and all files with .js, .json, and .yml extensions in the project root directory, and all files in the config and app folders.
If you want to copy additional files, you can specify it by adding the include in the package field to the f.yml file, you can configure the file name, or you can use the fast-glob syntax.↗The following example shows how to use the match:
#... The display of other attributes has been omitted

package:
  include: # Specify additional package file configuration by include attributes
    -static# static folder under the root directory of the project
    -a.json# a.json file under the root directory of the project
    -a/B/c.js# c.js file under directory a under directory B under the root directory of the project
    -a/B/c.json# c.js file under directory a under directory B under the root directory of the project
    -xxx/**/*.js# All js files in xxx directory under the root directory of the project
Experimental function
Turn on the experimental function by experimentalFeatures configuration in f.yml
1. ignoreTsError
Ignoring ts error during build without interrupting the build process.
experimentalFeatures:
	ignoreTsError: true
2. removeUselessFiles
Removing a large number of invalid files, such as LICENSE, *.ts.map, and **/test/ files, can effectively reduce the size of the build package.
experimentalFeatures:
	removeUselessFiles: true
3. fastInstallNodeModules
Selecting production dependencies from the current devDependencies for publishing at build time may significantly improve the publishing speed.
experimentalFeatures:
	fastInstallNodeModules: true
CLI extension
1. Life cycle expansion
Users can add midway-integration fields to package.json to extend cli's behavior according to the life cycle of each command.
For example, add custom logic after the package command installDevDep:
{
	"midway-integration": {
  	"lifecycle": {
    	"after:package:installDevDep": "npm run build"
    }
  }
}
The format of the lifecycle is ${ 'before' | 'after' | ''}:${ command }:${ command life cycle}.
List of declaration cycles for package commands:
 'cleanup', // Clean up the build directory
 'installDevDep', // installation and development period dependency
 CopyFile', // copy file: package.include and shared content
 'compile', //
 'emit', // compile function' package:after:tscompile'
 'analysisCode', // analysis code
 'copyStaticFile', // Copy static files in src to the dist directory, such as html, etc.
 'checkAggregation', // Detect high-density deployments
 'generateSpec', // Generate the description file of the corresponding platform, such as serverless.yml, etc.
 'generateEntry', // Generate the portal file for the corresponding platform
 'installLayer', // Install layer
 'installDep', // installation dependency
 'package', // function packaging
 'finalize', // complete
2. Extend through plug-ins
Users can write cli plug-ins themselves to implement more complex cli behaviors through plug-ins, or add custom commands. Currently, two plug-ins are supported:
- Npm plug-in, plug-in is an npm package
- Local plug-in, the plug-in is located locally.
Cli loads the plug-in by configuring the plugins field in the f.yml file:
plugins:
  -npm::test-plugin-model
  -local::./test/plugin
The plugin configuration format is ${ 'npm' | 'local' }:${ provider | | ''}:${ pluginName | | path }
Code reference for plug-ins:
// src/index.ts

import { BasePlugin } from '@midwayjs/command-core';

export class TestLalalaPlugin extends BasePlugin {
  commands = {
    lalala: {
      Usage: 'custom command',
      lifecycleEvents: [
        'a', // Custom Lifecycle
        'b',
      ],
      // Not yet
      options: {
        name: {
          usage: 'parameter name, for example: mw lalala -- name = 123',
          shortcut: 'n', // parameter abbreviation
        },
      },
    },
  };

  hooks = {
		// Add the command lifecycle extension in the current plugin
    // the life cycle of the lalala command
   	'lalala:a': async () => {

      // Output
    	this.core.cli.log('lalala command hook');

      // Get the parameters entered by the user.
      this.core.cli.log(this.core.options);

      // f.yml content
      this.core.cli.log(this.core.service);

      // Only the output under the-V parameter
      this.core.debug('lalala');
    },

    // Add command lifecycle extensions in other plug-ins
    // Execute "before" the copyFile life cycle of the package command
    'before:package:copyFile': async () => {
    	console.log('package command hook');
    },

  };
}